Creating a Courier Price Estimator in WordPress

September 24, 2020

Digital price estimates are a great way to give instant gratification and encourage customers to use your service over your competition.

This guide covers setting up a price estimator based on distance. Our initial setup was for a Courier, but it could also be used to estimate the price for Taxi and Bus rides.

Please note, this guide requires use of a paid plugin.

1. Requirements

Before you get started, here are a list of things you’ll need for this project:

Wordpress Website

The plugin used only currently supports WordPress. If you don't have a WordPress website, we offer competitive packages, go check them out!

Google Cloud Platform Account

Alongside having a normal Google account, you'll need a Google Cloud Platform account with billing enabled. Click the link below if you don't already have this:

WP Cost Estimation Plugin

You’ll need to install this plugin onto your WordPress site. If you’re unsure how to do this, please consult this guide

Once you have all of the above, let’s get started!

2. Get your Google API Key

The Plugin uses Google APIs to determine the distance between the locations. The plugin will need access to several APIs to function properly.

If you are unsure how to use the Google Cloud Platform service, please consult this guide.

First you’ll need to create a project, if you have never done this before and have an active account, clicking here should prompt you to create one.

Although the plugin doesn’t have documentation on which APIs are needed, we’ve found that using the below APIs works fine. These APIs need to be enabled in the API Library for your project inside Google Cloud Platform.

Maps Javascript API

Places API

Directions API

Once this is done you will need to create Credentials for your project, which should then give you an API key. Make a note of this API key as you will need to input it into the Plugin. It’s recommended you also set up restrictions inside the API key to ensure only your website can make requests.

3. Set up the Plugin

On your WordPress Dashboard, click on the menu item E&P Form Builder.

Once here, press on ‘Add a new form’. This will then open the dashboard. Scroll down to the see the settings for the form. 

We encourage you to run through the settings and configure it to suit your needs. Here are the settings we’ve changed but you may want it to work differently:

3.1 General Tab

Title: Your Form Title
Progress Bar: No Progress Bar
Google Maps Browser Key: Your API Key from the Google Console

3.2 Texts Tab

Last Button Step: “Submit my Estimate”

3.3 Email Tab

Admin Email: Your admin email

3.4 Design Tab

Animation Speed: Immediate
Flip Effect on Images: No

Have a poke around!

Don’t just trust us! Have a look through the settings tabs and tweak whatever you feel is necessary. Almost all of them are easy to understand and modify.

4. Create the form

Once the settings are done, we need to build the form. This blog only covers setting up a simple distance cost estimation, but the plugin does have a plethora of other useful features as detailed by their site.

4.1 Create the first step

Select ‘+Add a step’ from the top menu.

A circle should appear in the center of the work area titled ‘My Step’.

Hover over it and press on the edit icon (it looks like a pencil).

4.2 Name the Step

On the new screen that opens, select ‘Step setting’

In the ‘Title’ field, type in what you want the customer to see when opening the page (I went with “Get an Estimate”.

Press Save.

4.3 Add the first component

Select ‘Add a component’.

In the side menu that pops out, drag the ‘Text Field’ Widget into the center of your work area.

Press press on the edit icon (the pencil) to bring up the component settings.

4.4 Edit the component

Add a title and small description. 

The Title is what will appear when the user hovers over the step and in the final summary. The small description appears beneath the field when the user is filling out the estimate.

I entered ‘From’ in both fields.

In the ‘Type of Information’ field, select ‘Address’. Select ‘Yes’ in the ‘Autocomplete’ Field.

Press ‘Save’ at the bottom.

4.5 Do the same again!

Create another identical field using the same settings, but with “To” in the title and small description

Take a breather!

If you’ve done everything correctly, you should be left with a page that looks like this

At this step I like the users to move to another step before selecting their vehicle type, but if you want all of the questions to appear on the same page, you can skip the next step.

4.6 Create the second step

Press the X on the top right of the screen (don’t worry, progress is saved) to return to the main Form dashboard.

Add another step, naming it in the ‘Step settings’ area (I named mine “Choose a Vehicle”).

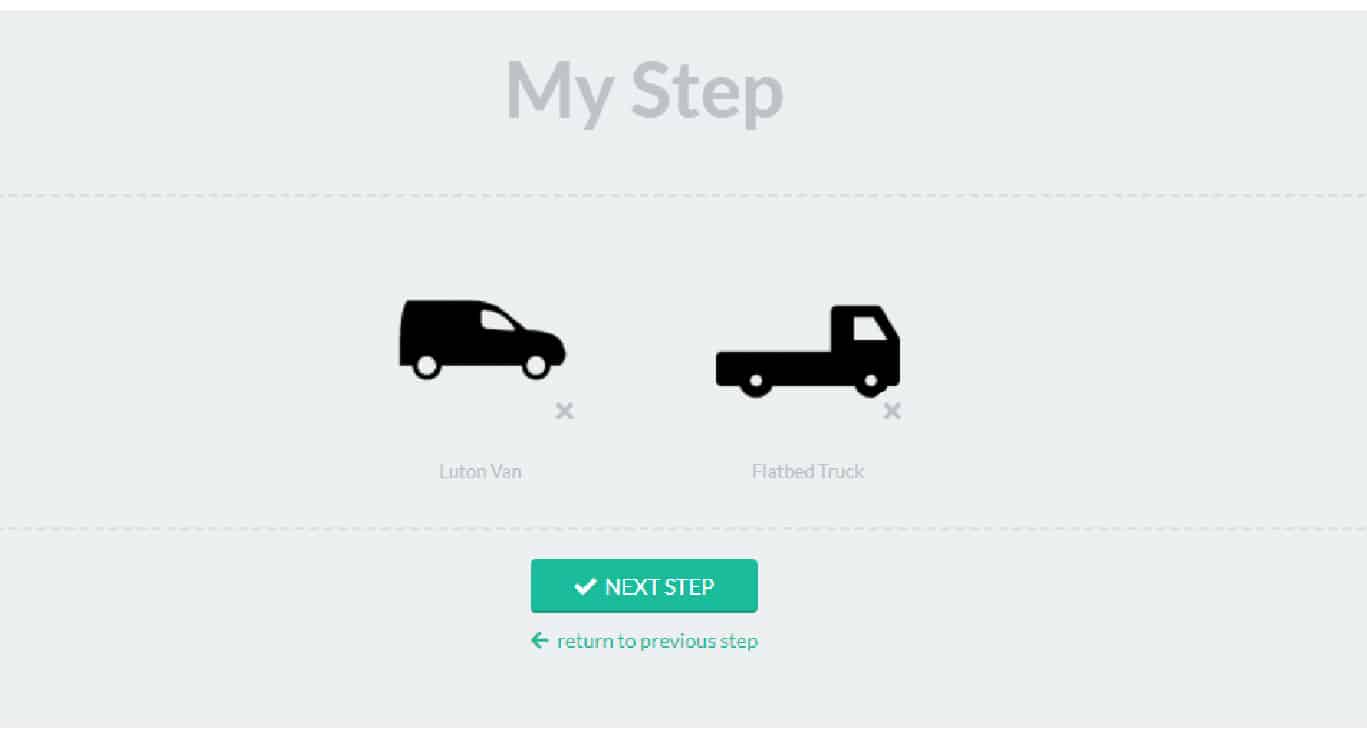
4.7 Add the Image Widget

Add the “Image” Widget and press edit.

4.8 Add the Price Calculation

On the top right, set ‘Price calculation’ to yes. Then press the ‘Add a distance’ Button

On the ‘Departure Address’ side, add your ‘From’ address in the ‘Address’ Field. Add your ‘To’ address to the other side. (I also changed ‘km’ to ‘miles’ near the bottom)

4.9 Adding a Multiplier

Press insert, and a code should appear in the field on the right.

Add an asterisk (*) and then a multiplier. This will tell the form how much to charge per mile

(i.e. if the multiplier is 10, it will charge £10 per mile).

4.10 Set up the remaining vehicles

Repeat this for each vehicle you’d like to set up. In my example I set up two vehicles, one at £10 / mile and one at £15 / mile.

4.11 Adding Conditions

Once all of your vehicles are set up, we’re going to add some conditions to ensure the user can only select one vehicle.

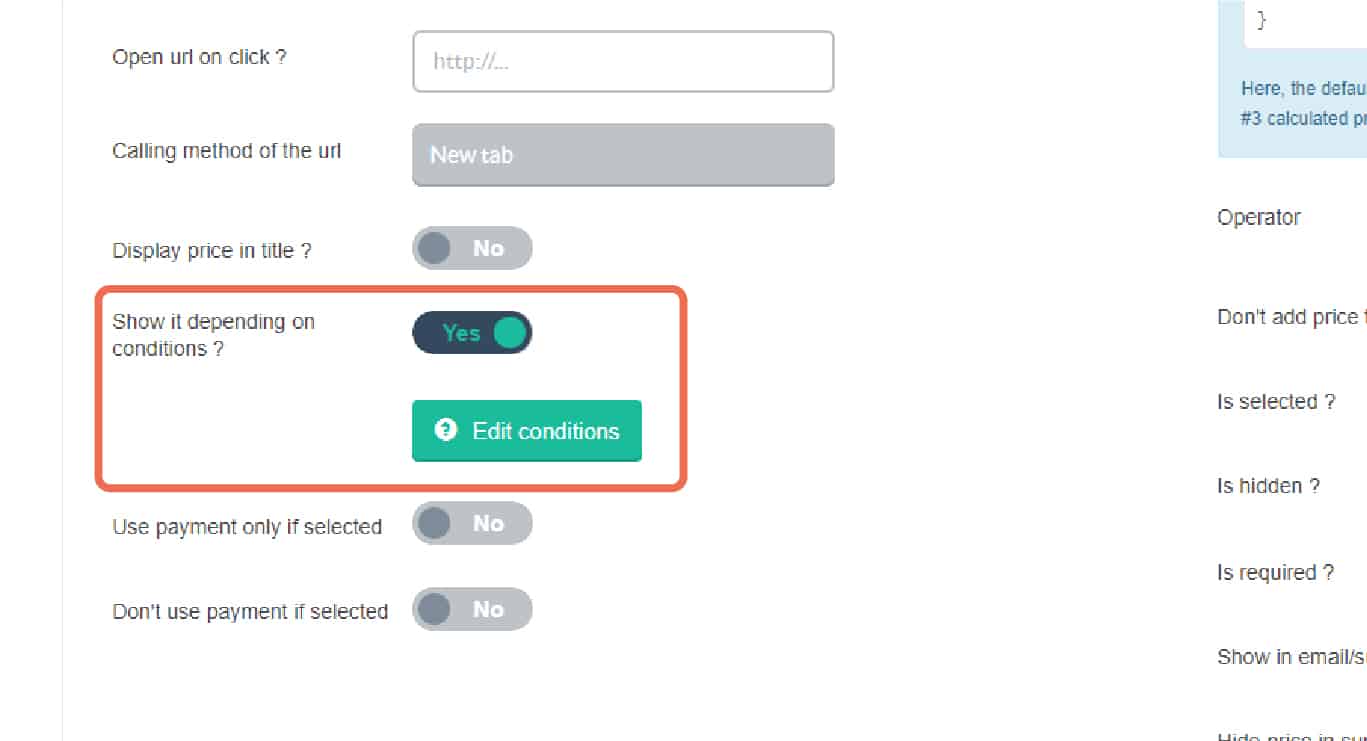
To do this, press edit on one of your vehicles and toggle the ‘Show it depending on conditions?’ option, then press ‘Edit’.

4.12 Adding Conditions (2)

Press ‘Add a condition’ and a drop-down will appear in the table beneath, select the ‘Element’ field and change it to another of your vehicles, then in the ‘condition’ field select ‘Is unselected’.

f you have more than two vehicles, repeat this for all of the other vehicles.


4.13 Complete it for all Vehicles

Press ‘Save’, and then repeat the process for any other vehicles you have.

4.14 Link the steps

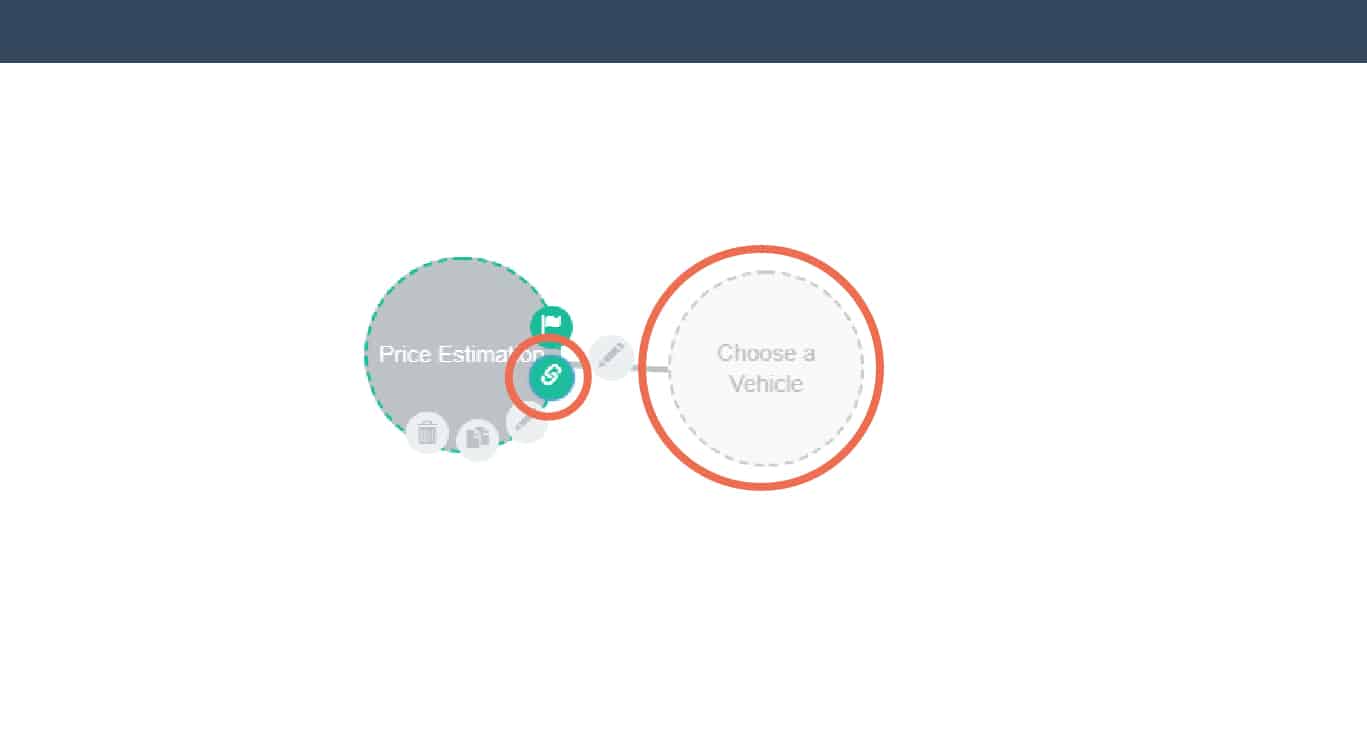
Once done, back out all the way to the dashboard. If you have two steps set up like my example, hover over the first step and press the link icon, then select the second step. A line should appear between the two steps.

Congrats!

Your form is now done. All that is left to do is embed it on the WordPress page.

5. Embed the Form

5.1 Get the Shortcode

On the form dashboard, press on ‘shortcode’ in the top menu. Copy the white text in the green box.

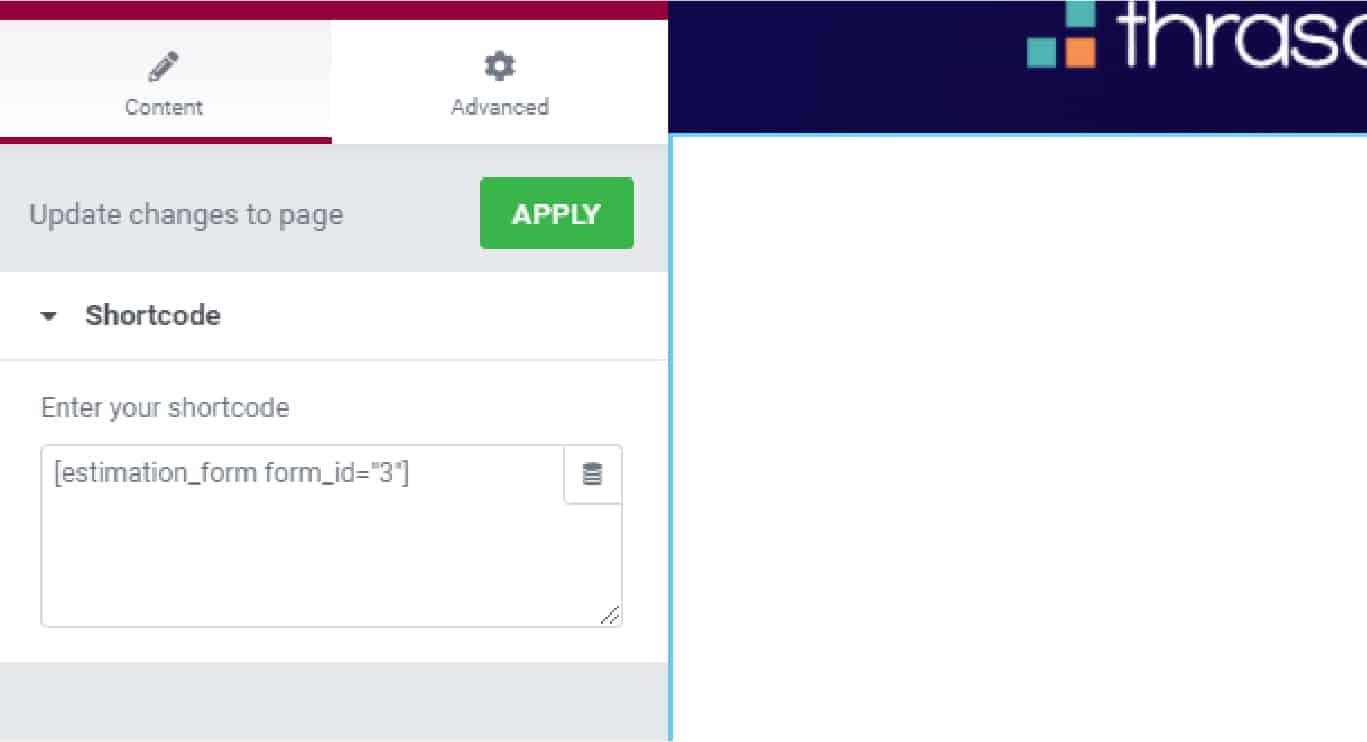
(it should look something like this [estimation_form form_id=”3″])

5.2 Add it to a Page

Create or navigate to the page you want the form to sit on, add a shortcode widget and paste the code in. Update / save the page and the form will now be live.

The form is now live and is able to take estimates. You should be notified via email whenever a customer fills in the form. You can also add a step to collect more detailed contact information, or add notes regarding the booking, but the customer email will be collected by default so we’ve just left it as it is.

Your Photo Restoration Order

Please complete your details below and follow instructions for payment.